UDES XX 20 Linka/Mot Alrik


|
UDES XX 20 |

|
Linka/Mot Alrik |
Nothing
| Category | Anti-Tank Gun |
|---|---|
| Armor | Heavy |
| Nation | Sweden |
| Rarity | Gold |
| Blueprint Rank | ? |
| Live2D | Not available |
Talents

|
Performing | 3 |

|
Artistry | 3 |

|
Literature | 2 |
Basic equipment slots


Additionnal Raid slots

Additionnal Fate slots
Unknown
Shells

|
[AP] Conventional |

|
[APDS] Discarding Sabot |

|
[HEAT] Anti-Tank |
Attributes :
|
value at level 1
+ increase per level value at level 99 |
Attribute's icon |
Attribute's name
Rank in ATG category for this attribute (92 vehicles in this category) Click here to see rankings Δ ± deviation from the median value for this attribute at level 99 |
|
789 +19.39 2689 |

|
Firepower Ranked 17 Δ +342 |
|
389 +9.51 1320 |

|
Penetration Ranked 3 Δ +239 |
|
140 |

|
Targeting Ranked 2 Δ +50 |
|
901 +21.92 3048 |

|
Durability Ranked 29 Δ +244 |
|
240 +5.71 799 |

|
Armor Ranked 54 Δ -124 |
|
125 |

|
Evasion Ranked 7 Δ +55 |
|
105 |

|
Stealth Ranked 5 Δ +30 |
|
80 |

|
Detection Ranked 5 Δ +20 |
|
B 60 |
Fire resistance 12 Δ +2 |
|
|
A 66 |
Critical resistance 14 Δ +0 |
|
|
S 80 |
Critical defense 4 Δ +10 |
|
Active Skills :

|
Assault Contact Skill |
|
1. Startup: Contact Stage
Attack 3 targets, dealing 6629..X damage (55% damage) |
|

|
Firebomb Shot Contact Skill |
|
1. Startup: Contact Stage
Deals 5691..X damage (150% damage), greatly ignores armor if target is on fire |
|

|
High Velocity Shot Shelling Skill |
|
1. Startup: Shelling Stage
Deals 5110..X damage to a relatively high-stealth enemy (105% damage) |
|

|
Sniper Shot Contact Skill |
|
1. Startup: Contact Stage
Deals 5656..X damage with increased crit chance (120% damage) |
|

|
Flat top
Increases ricochet chance for [AP] and [AT] attacks |

|
Front
Immune to [Bushy] terrain effect : [Forest] [Forest] Troughout the battle, Firepower is reduced |

|
Low
Immune to [Trap] terrain effect : [Street] [Street] Troughout the battle, chance of being hit by a critical hit is increased (Critical resistance down) |

|
Rear
Immune to [Swamp] terrain effect : [Dirt] [Dirt] Troughout the battle, Penetration is reduced |

|
Treads
Immune to [Snowy] terrain effect : [Snow] [Snow] Troughout the battle, Evasion is reduced |

|
Brisk
Immune to [Sluggish] terrain effect : Probably fail to attack Probably fail to attack |

|
D proof
Immune to [Dusty] terrain effect : [Desert] [Desert] Troughout the battle, Damage received is increased |

|
Energized
Immune to [Drowsy] terrain effect : Critical resistance Critical resistance |
Engines

Tier 1 |

|


 DP Filter Engine I 110 200 10
 |

Tier 2 |

|
DP Filter Engine II 220 880 20 |

Tier 3 |

|
DP Filter Engine III 340 1600 40 |
Chassis
|
Tier 1 |

|


 Bottom-Heavy Chassis 405 95 25 30
 |
|
Tier 2 |

|
Bottom-Heavy Chassis II 1170 230 40 65 |
|
Tier 3 |

|
 Bottom-Heavy ES Chassis 870 70 300 70 130
 |
Armors
|
Tier 1 |

|
 Heavy Rolled Riveted Armor 75 15
 |
|
Tier 1 |

|
 Heavy Welded Rolled Armor 105 10 10
 |
|
Tier 1 |

|

 Heavy Spaced Wedge Armor 115 35
 |
|
Tier 1 |

|
 Heavy Composite Wedge Armor 200
 |
|
Tier 2 |

|
Heavy Rolled Riveted Armor II 235 40 |
|
Tier 2 |

|
Heavy Welded Rolled Armor II 280 25 30 |
|
Tier 2 |

|
Heavy Spaced Wedge Armor II 250 75 |
|
Tier 2 |

|
Heavy Composite Wedge Armor II 400 5 |
|
Tier 3 |

|
Heavy Rolled Riveted Armor III 395 65 |
|
Tier 3 |

|
Heavy Welded Rolled Armor III 425 40 45 |
|
Tier 3 |

|
Heavy Spaced Wedge Armor III 400 115 |
|
Tier 3 |

|
Heavy Composite Wedge Armor III 605 5 |
|
Tier 3 |

|
 Heavy Tough Reinforced Special Armor 300 610 40 40
 |
Shells From game version 1.9.8.9
|
Tier 2 |
Level 5 |

 Heavy APC (L) 500355
 |
| Range | 2550 | |
|
Tier 3 |
Level 6 |
 Heavy APCBC (L) 78054060
 |
| Range | 2550 | |
|
Tier 1 |
Level 3 |

 Heavy APDS (L) 31585
 |
| Range | 5880 | |
|
Tier 2 |
Level 3 |
 Heavy FSDS (L) 84521035
 |
| Range | 5880 | |
|
Tier 3 |
Level 1 |
 Heavy FSLRDS (L) 127531050
 |
| Range | 5880 | |
|
Tier 3 |
Level 3 |
 Heavy QFLRDS Mag (L) 650570
 |
| Range | 5880 | |
|
Tier 3 |
Level 6 |
 FSLRDS (L) 460710105
 |
| Range | 5880 | |
|
Tier 1 |
Level 2 |

 LDERAT (L) 2058050
 |
| Range | 5840 | |
|
Tier 1 |
Level 5 |
 EFP AT (L) 395175
 |
| Range | 5840 | |
|
Tier 1 |
Level 6 |
 Shaped WSAT (L) 285225
 |
| Range | 5840 | |
|
Tier 2 |
Level 2 |
BBERAT (L) 87022570 |
| Range | 5840 | |
|
Tier 2 |
Level 4 |
Cluster EFP AT (L) 845355145 |
| Range | 5840 | |
|
Tier 2 |
Level 6 |
Shaped WSFSAT (L) 60045590 |
| Range | 5840 | |
|
Tier 3 |
Level 2 |
RPERAT (L) 178036595 |
| Range | 5840 | |
|
Tier 3 |
Level 5 |
Cluster SADARM (L) 1395570230 |
| Range | 5840 | |
|
Tier 3 |
Level 6 |
Shaped CFS WSAT (L) 920690130 |
| Range | 5840 | |
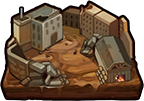
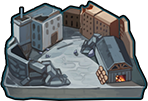
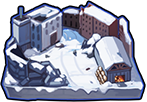
Illustration :
Main Illustration

How to unlock:


Dogtag
x
104

Wreck
x
774

Blueprint N6
x
48

S 6
Aux Engine
x
1

Silver
x
8 000 000

Terrain performance based on chassis and engine bonus
Warning : This is only an approximation and a work-in-progress.
- Some metal maidens may have more than one type of engine/chassis and therefore can not accumulate all the bonuses from theirs engines/chassis at the same time.
- You also have to take into account the range of the ammo available for your metal maiden for each terrains
Dirt streets
Adequate equipment : 2 out of 3
- Detection
Missing: [w proof]
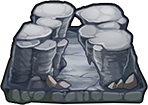
Rocky streets
Adequate equipment : 1 out of 3
- Armor
- Targeting
Missing: [w proof] [tires] [light]
Snow streets
Adequate equipment : 2 out of 3
- Damage received
Missing: [w proof] [tires] [light] [c proof]

Grass forest
Adequate equipment : 1 out of 1
Missing: [w proof] [tires] [light] [c proof]

Dirt forest
Adequate equipment : 2 out of 3
- Detection
Missing: [w proof] [tires] [light] [c proof]
Rocky forest
Adequate equipment : 1 out of 3
- Armor
- Targeting
Missing: [w proof] [tires] [light] [c proof]

Snow forest
Adequate equipment : 2 out of 3
- Damage received
Missing: [w proof] [tires] [light] [c proof]

Grass hills
Adequate equipment : 0 out of 1
- Evasion
Missing: [w proof] [tires] [light] [c proof] [s proof]

Desert hills
Adequate equipment : 1 out of 3
- Fire resistance
- Evasion
Missing: [w proof] [tires] [light] [c proof] [s proof] [h proof]

Desert plains
Adequate equipment : 1 out of 3
- Fire resistance
- Firepower
Missing: [w proof] [tires] [light] [c proof] [s proof] [h proof] [angled]

Desert valley
Adequate equipment : 1 out of 3
- Fire resistance
- Stealth
Missing: [w proof] [tires] [light] [c proof] [s proof] [h proof] [angled] [silent]
Rocky valley
Adequate equipment : 0 out of 3
- Armor
- Targeting
- Stealth
Missing: [w proof] [tires] [light] [c proof] [s proof] [h proof] [angled] [silent]

Snow valley
Adequate equipment : 1 out of 3
- Damage received
- Stealth
Missing: [w proof] [tires] [light] [c proof] [s proof] [h proof] [angled] [silent]

Grass plains
Adequate equipment : 0 out of 1
- Firepower
Missing: [w proof] [tires] [light] [c proof] [s proof] [h proof] [angled] [silent]

Dirt plains
Adequate equipment : 1 out of 3
- Detection
- Firepower
Missing: [w proof] [tires] [light] [c proof] [s proof] [h proof] [angled] [silent]
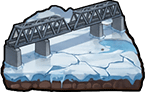
Ice plains
Adequate equipment : 0 out of 3
- Damage received
- Armor
- Firepower
Missing: [w proof] [tires] [light] [c proof] [s proof] [h proof] [angled] [silent]

Snow plains
Adequate equipment : 1 out of 3
- Damage received
- Firepower
Missing: [w proof] [tires] [light] [c proof] [s proof] [h proof] [angled] [silent]
Crushed ice streets
Adequate equipment : 1 out of 3
- Damage received
- Targeting
Missing: [w proof] [tires] [light] [c proof] [s proof] [h proof] [angled] [silent]

Shoals forest
Adequate equipment : 2 out of 3
- Detection
Missing: [w proof] [tires] [light] [c proof] [s proof] [h proof] [angled] [silent]

Shoals hills
Adequate equipment : 1 out of 3
- Detection
- Evasion
Missing: [w proof] [tires] [light] [c proof] [s proof] [h proof] [angled] [silent]

Muddy snow forest
Adequate equipment : 3 out of 3
Missing: [w proof] [tires] [light] [c proof] [s proof] [h proof] [angled] [silent]

Crushed ice valley
Adequate equipment : 0 out of 3
- Damage received
- Targeting
- Stealth
Missing: [w proof] [tires] [light] [c proof] [s proof] [h proof] [angled] [silent]

Rocky desert plains
Adequate equipment : 0 out of 3
- Armor
- Fire resistance
- Firepower
Missing: [w proof] [tires] [light] [c proof] [s proof] [h proof] [angled] [silent]
Rocky desert streets
Adequate equipment : 1 out of 3
- Armor
- Fire resistance
Missing: [w proof] [tires] [light] [c proof] [s proof] [h proof] [angled] [silent]

River hills
Adequate equipment : 0 out of 3
- Fire resistance
- Penetration
- Evasion
Missing: [w proof] [tires] [light] [c proof] [s proof] [h proof] [angled] [silent] [moisture counter] [buoyant]

River streets
Adequate equipment : 1 out of 3
- Fire resistance
- Penetration
Missing: [w proof] [tires] [light] [c proof] [s proof] [h proof] [angled] [silent] [moisture counter] [buoyant]

River valley
Adequate equipment : 0 out of 3
- Fire resistance
- Penetration
- Stealth
Missing: [w proof] [tires] [light] [c proof] [s proof] [h proof] [angled] [silent] [moisture counter] [buoyant]

Spore plains
Adequate equipment : 2 out of 3
- Firepower
Missing: [w proof] [tires] [light] [c proof] [s proof] [h proof] [angled] [silent] [moisture counter] [buoyant]

Spore valley
Adequate equipment : 2 out of 3
- Stealth
Missing: [w proof] [tires] [light] [c proof] [s proof] [h proof] [angled] [silent] [moisture counter] [buoyant]

Hot bed mountains
Adequate equipment : 0 out of 3
- Armor
- Fire resistance
- Firepower Targeting
Missing: [w proof] [tires] [light] [c proof] [s proof] [h proof] [angled] [silent] [moisture counter] [buoyant] [calibrated]

Rocky mountains
Adequate equipment : 0 out of 3
- Armor
- Targeting
- Firepower Targeting
Missing: [w proof] [tires] [light] [c proof] [s proof] [h proof] [angled] [silent] [moisture counter] [buoyant] [calibrated]

Snow mountains
Adequate equipment : 1 out of 3
- Damage received
- Firepower Targeting
Missing: [w proof] [tires] [light] [c proof] [s proof] [h proof] [angled] [silent] [moisture counter] [buoyant] [calibrated]
Quotes
| From | Quote |
|---|---|
| Intro | The technicians mentioned that this dual attire consumes a lot of energy, but it also processes twice the data. We'll need to keep an eye on its performance in actual combat. |
| Main screen #1 | |
| Main screen #2 | |
| Main screen #3 | |
| Main screen #4 | |
| Main screen #5 | |
| Main screen #6 | |
| On upgrade | |
| Pre-attack #1 | |
| Pre-attack #2 | |
| Pre-attack #3 | |
| On attack #1 | |
| On attack #2 | |
| On attack #3 | |
| On attack #4 | |
| On attack #5 | |
| On attack #6 | |
| On attack #7 | |
| Getting hit | |
| Upon destruction | |
| Assignation to a squad | |
| Adding essential equipment #1 | |
| Adding essential equipment #2 | |
| Adding essential equipment #3 | |
| Adding essential equipment #4 | |
| Adding equipment to a slot #1 | |
| Adding equipment to a slot #2 | |
| Adding equipment to a slot #3 | |
| Unequip all gear | |
| Battle victory #1 | |
| Battle victory #2 | |
| Battle victory #3 | |
| Battle loss | |
| Fate |