TOG1 Sylas Hubbard


|
TOG1 |

|
Sylas Hubbard |


| Category | Heavy Tank |
|---|---|
| Armor | Heavy |
| Nation | Britannia |
| Rarity | Purple |
| Blueprint Rank | N3+ |
| Live2D | Not available |
Talents

|
Performing | 1 |

|
Artistry | 3 |
Basic equipment slots


Additionnal Raid slots

Additionnal Fate slots
Shells

|
[AP] Conventional |

|
[APDS] Discarding Sabot |

|
[HE] High-Explosive |

|
[HESH] Squash-Head |
Attributes :
|
value at level 1
+ increase per level value at level 99 |
Attribute's icon |
Attribute's name
Rank in HT category for this attribute (99 vehicles in this category) Click here to see rankings Δ ± deviation from the median value for this attribute at level 99 |
|
445 +15.81 1994 |

|
Firepower Ranked 73 Δ -277 |
|
206 +6.61 853 |

|
Penetration Ranked 63 Δ -189 |
|
70 |

|
Targeting Ranked 18 Δ -20 |
|
946 +26.20 3513 |

|
Durability Ranked 21 Δ +227 |
|
257 +7.81 1022 |

|
Armor Ranked 53 Δ -75 |
|
35 |

|
Evasion Ranked 18 Δ -35 |
|
45 |

|
Stealth Ranked 6 Δ +0 |
|
40 |

|
Detection Ranked 14 Δ -20 |
|
D 36 |
Fire resistance 22 Δ -18 |
|
|
C 52 |
Critical resistance 18 Δ -14 |
|
|
B 68 |
Critical defense 9 Δ -4 |
|
Active Skills :

|
Battle Scars CQB Skill |
|
1. Startup: CQB Stage
Firepower and Penetration increases based on missing HP, dealing 8645..13152 damage (110% damage) |
|

|
Fire Change Contact Skill |
|
1. Startup: Contact Stage
Uses the highest firepower and penetration of the squad's FRP and PEN stats to attack the target for 6391..X damage (65% damage) |
|

|
Multi-Barrel-Gun Contact Skill |
|
1. Startup: Contact Stage
Attack 2 targets, dealing 5656..X damage (105% damage) |
|

|
New Guard Contact Skill |
|
1. Startup: Contact Stage
Skips attack and increases reactive armor by 4508..X (stacks with equipped) |
|

|
Front
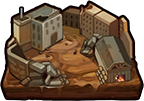
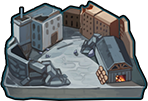
Immune to [Bushy] terrain effect : [Forest] [Forest] Troughout the battle, Firepower is reduced |

|
Low
Immune to [Trap] terrain effect : [Street] [Street] Troughout the battle, chance of being hit by a critical hit is increased (Critical resistance down) |

|
Treads
Immune to [Snowy] terrain effect : [Snow] [Snow] Troughout the battle, Evasion is reduced |

|
D proof
Immune to [Dusty] terrain effect : [Desert] [Desert] Troughout the battle, Damage received is increased |

|
W proof
Immune to [Wet] terrain effect : [Dirt] [Dirt] Troughout the battle, Detection is drastically reduced |
Engines

Tier 1 |

|

 WP DP Engine 25 30 20
 |

Tier 2 |

|
DP WP Engine II 35 65 45 |

Tier 3 |

|
WP DP Engine III 50 100 75 |
Chassis
|
Tier 1 |

|


 Front-Turret Chassis 35 15 250 25
 |
|
Tier 2 |

|
Front-Turret Chassis II 125 25 1120 65 |
|
Tier 3 |

|
Front-Turret Chassis III 225 35 2075 115 |
Armors
|
Tier 1 |

|
 Heavy Welded Rolled Armor 105 10 10
 |
|
Tier 1 |

|
 Heavy Cast Welded Armor 130 100 5 5
 |
|
Tier 1 |

|
 Heavy Spaced Armor 140 35
 |
|
Tier 1 |

|
 Heavy Composite Armor 220
 |
|
Tier 2 |

|
Heavy Cast Welded Armor II 300 275 20 15 |
|
Tier 2 |

|
Heavy Welded Rolled Armor II 280 25 30 |
|
Tier 2 |

|
Heavy Spaced Armor II 300 75 |
|
Tier 2 |

|
Heavy Composite Armor II 440 5 |
|
Tier 3 |

|
Heavy Welded Rolled Armor III 425 40 45 |
|
Tier 3 |

|
Heavy Cast Welded Armor III 470 450 30 25 |
|
Tier 3 |

|
Heavy Spaced Armor III 440 110 |
|
Tier 3 |

|
Heavy Composite Armor III 665 5 |
Shells From game version 1.12.2.0
|
Tier 1 |
Level 1 |
 APBC (S) 1008015
 |
| Range | 900 | |
|
Tier 1 |
Level 4 |
 AP-T (S) 245135
 |
| Range | 900 | |
|
Tier 2 |
Level 1 |
 APCBC (S) 35025535
 |
| Range | 900 | |
|
Tier 2 |
Level 3 |
APC-T (S) 495260 |
| Range | 900 | |
|
Tier 3 |
Level 2 |
APCBC-T (S) 77540055 |
| Range | 900 | |
|
Tier 3 |
Level 3 |
 QFCBC Mag (S) 106536555
 |
| Range | 900 | |
|
Tier 1 |
Level 1 |

 APSSDS (S) 1208010
 |
| Range | 1550 | |
|
Tier 2 |
Level 1 |
SSLRDS (S) 42524540 |
| Range | 1550 | |
|
Tier 3 |
Level 3 |
 QFLR Mag (S) 935490
 |
| Range | 1550 | |
|
Tier 1 |
Level 2 |

 SSHE (S) 2356035
 |
| Range | 1620 | |
|
Tier 1 |
Level 6 |
Concave HE (S) 4609045 |
| Range | 1620 | |
|
Tier 2 |
Level 2 |
Concave HE-T (S) 77014570 |
| Range | 1620 | |
|
Tier 2 |
Level 6 |
 HEDM HE (S) 97518015
 |
| Range | 1620 | |
|
Tier 3 |
Level 2 |
Concave Elongated HCHE-T (S) 1285240115 |
| Range | 1620 | |
|
Tier 3 |
Level 6 |
Active HEDM HE (S) 149027525 |
| Range | 1620 | |
|
Tier 1 |
Level 1 |

 Heavy HESH-F (M) 28515
 |
| Range | 1020 | |
|
Tier 1 |
Level 4 |
HESH-T (M) 285105 |
| Range | 1020 | |
|
Tier 2 |
Level 1 |
Modified Heavy HESH-F (M) 100555 |
| Range | 1020 | |
|
Tier 2 |
Level 4 |
Modified HESH-T (M) 700235 |
| Range | 1020 | |
|
Tier 3 |
Level 2 |
 Modified FSHESH-T (M) 103534565
 |
| Range | 1020 | |
|
Tier 3 |
Level 3 |
Modified FSHESH-F (M) 187510570 |
| Range | 1020 | |
Illustration :
Main Illustration

How to unlock:

Appears in BWMG Depot LV 1
Can be obtained by cleaning the following volumes from story:
Volume 2-1
Volume 2-2
Volume 2-3
Volume 2-4
Volume 3-1
Volume 3-2
Volume 3-3
Volume 3-4
Volume 5-1
Volume 5-2
Volume 5-3
Volume 5-4
Volume 6-1
Volume 6-2
Volume 6-3
Volume 6-4


Wreck
x
89

Blueprint N3
x
16

S 3

Counterrecoil
x
1

Silver
x
405 000
Terrain performance based on chassis and engine bonus
Warning : This is only an approximation and a work-in-progress.
- Some metal maidens may have more than one type of engine/chassis and therefore can not accumulate all the bonuses from theirs engines/chassis at the same time.
- You also have to take into account the range of the ammo available for your metal maiden for each terrains
Dirt streets
Adequate equipment : 2 out of 3
- Penetration
Missing: [rear]
Rocky streets
Adequate equipment : 1 out of 3
- Armor
- Targeting
Missing: [rear] [tires] [light]
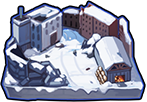
Snow streets
Adequate equipment : 2 out of 3
- Damage received
Missing: [rear] [tires] [light] [c proof]

Grass forest
Adequate equipment : 1 out of 1
Missing: [rear] [tires] [light] [c proof]

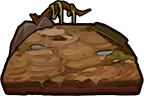
Dirt forest
Adequate equipment : 2 out of 3
- Penetration
Missing: [rear] [tires] [light] [c proof]
Rocky forest
Adequate equipment : 1 out of 3
- Armor
- Targeting
Missing: [rear] [tires] [light] [c proof]

Snow forest
Adequate equipment : 2 out of 3
- Damage received
Missing: [rear] [tires] [light] [c proof]

Grass hills
Adequate equipment : 0 out of 1
- Evasion
Missing: [rear] [tires] [light] [c proof] [s proof]

Desert hills
Adequate equipment : 1 out of 3
- Fire resistance
- Evasion
Missing: [rear] [tires] [light] [c proof] [s proof] [h proof]

Desert plains
Adequate equipment : 1 out of 3
- Fire resistance
- Firepower
Missing: [rear] [tires] [light] [c proof] [s proof] [h proof] [angled]

Desert valley
Adequate equipment : 1 out of 3
- Fire resistance
- Stealth
Missing: [rear] [tires] [light] [c proof] [s proof] [h proof] [angled] [silent]
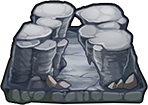
Rocky valley
Adequate equipment : 0 out of 3
- Armor
- Targeting
- Stealth
Missing: [rear] [tires] [light] [c proof] [s proof] [h proof] [angled] [silent]

Snow valley
Adequate equipment : 1 out of 3
- Damage received
- Stealth
Missing: [rear] [tires] [light] [c proof] [s proof] [h proof] [angled] [silent]

Grass plains
Adequate equipment : 0 out of 1
- Firepower
Missing: [rear] [tires] [light] [c proof] [s proof] [h proof] [angled] [silent]
Dirt plains
Adequate equipment : 1 out of 3
- Penetration
- Firepower
Missing: [rear] [tires] [light] [c proof] [s proof] [h proof] [angled] [silent]
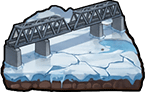
Ice plains
Adequate equipment : 0 out of 3
- Damage received
- Armor
- Firepower
Missing: [rear] [tires] [light] [c proof] [s proof] [h proof] [angled] [silent]

Snow plains
Adequate equipment : 1 out of 3
- Damage received
- Firepower
Missing: [rear] [tires] [light] [c proof] [s proof] [h proof] [angled] [silent]
Crushed ice streets
Adequate equipment : 1 out of 3
- Damage received
- Targeting
Missing: [rear] [tires] [light] [c proof] [s proof] [h proof] [angled] [silent]

Shoals forest
Adequate equipment : 3 out of 3
Missing: [rear] [tires] [light] [c proof] [s proof] [h proof] [angled] [silent]
Shoals hills
Adequate equipment : 2 out of 3
- Evasion
Missing: [rear] [tires] [light] [c proof] [s proof] [h proof] [angled] [silent]

Muddy snow forest
Adequate equipment : 2 out of 3
- Penetration
Missing: [rear] [tires] [light] [c proof] [s proof] [h proof] [angled] [silent]

Crushed ice valley
Adequate equipment : 0 out of 3
- Damage received
- Targeting
- Stealth
Missing: [rear] [tires] [light] [c proof] [s proof] [h proof] [angled] [silent]
Rocky desert plains
Adequate equipment : 0 out of 3
- Armor
- Fire resistance
- Firepower
Missing: [rear] [tires] [light] [c proof] [s proof] [h proof] [angled] [silent]
Rocky desert streets
Adequate equipment : 1 out of 3
- Armor
- Fire resistance
Missing: [rear] [tires] [light] [c proof] [s proof] [h proof] [angled] [silent]

River hills
Adequate equipment : 0 out of 3
- Fire resistance
- Penetration
- Evasion
Missing: [rear] [tires] [light] [c proof] [s proof] [h proof] [angled] [silent] [moisture counter] [buoyant]
River streets
Adequate equipment : 1 out of 3
- Fire resistance
- Penetration
Missing: [rear] [tires] [light] [c proof] [s proof] [h proof] [angled] [silent] [moisture counter] [buoyant]

River valley
Adequate equipment : 0 out of 3
- Fire resistance
- Penetration
- Stealth
Missing: [rear] [tires] [light] [c proof] [s proof] [h proof] [angled] [silent] [moisture counter] [buoyant]

Spore plains
Adequate equipment : 0 out of 3
- Probably fail to attack
- Critical resistance
- Firepower
Missing: [rear] [tires] [light] [c proof] [s proof] [h proof] [angled] [silent] [moisture counter] [buoyant] [energized] [brisk]

Spore valley
Adequate equipment : 0 out of 3
- Probably fail to attack
- Critical resistance
- Stealth
Missing: [rear] [tires] [light] [c proof] [s proof] [h proof] [angled] [silent] [moisture counter] [buoyant] [energized] [brisk]
Hot bed mountains
Adequate equipment : 0 out of 3
- Armor
- Fire resistance
- Firepower Targeting
Missing: [rear] [tires] [light] [c proof] [s proof] [h proof] [angled] [silent] [moisture counter] [buoyant] [energized] [brisk] [calibrated]

Rocky mountains
Adequate equipment : 0 out of 3
- Armor
- Targeting
- Firepower Targeting
Missing: [rear] [tires] [light] [c proof] [s proof] [h proof] [angled] [silent] [moisture counter] [buoyant] [energized] [brisk] [calibrated]

Snow mountains
Adequate equipment : 1 out of 3
- Damage received
- Firepower Targeting
Missing: [rear] [tires] [light] [c proof] [s proof] [h proof] [angled] [silent] [moisture counter] [buoyant] [energized] [brisk] [calibrated]
Quotes
| From | Quote |
|---|---|
| Intro | |
| Main screen #1 | |
| Main screen #2 | |
| Main screen #3 | |
| Main screen #4 | |
| Main screen #5 | |
| Main screen #6 | |
| On upgrade | |
| Pre-attack #1 | |
| Pre-attack #2 | |
| Pre-attack #3 | |
| On attack #1 | |
| On attack #2 | |
| On attack #3 | |
| On attack #4 | |
| On attack #5 | |
| On attack #6 | |
| On attack #7 | |
| Getting hit | |
| Upon destruction | |
| Assignation to a squad | |
| Adding essential equipment #1 | |
| Adding essential equipment #2 | |
| Adding essential equipment #3 | |
| Adding essential equipment #4 | |
| Adding equipment to a slot #1 | |
| Adding equipment to a slot #2 | |
| Adding equipment to a slot #3 | |
| Unequip all gear | |
| Battle victory #1 | |
| Battle victory #2 | |
| Battle victory #3 | |
| Battle loss | |
| Fate |